December 12, 2010 by Vincent
How-To: Downgrade from Windows Live Messenger 2011
 Windows Live Messenger 2011 might spot a cleaner interface and better Facebook integration, but to many users, these doesn’t justify the inability to change display name and other missing features like handwriting.
Read on if you are one of those Windows Live Messenger 2011 haters and wish to downgrade to an older version.
Uninstall Windows Live Messenger 2011
This part is vital. The installation of an older version of WLM later might be unsuccessful if WLM 2011 is not cleanly uninstalled.
Standard uninstalling procedure:
- Control Panel > Programs > Uninstall a program
- Select and uninstall Windows Live Essentials 2011
You are required to uninstall everything that comes under Windows Live Essential 2011, not just WLM 2011.

Install Older Version of Windows Live Messenger
Now that you have successfully uninstall Windows Live Messenger 2011, let’s source for the installation files of the older versions.
Download Windows Live Messenger 2009 installer from any of these sites:
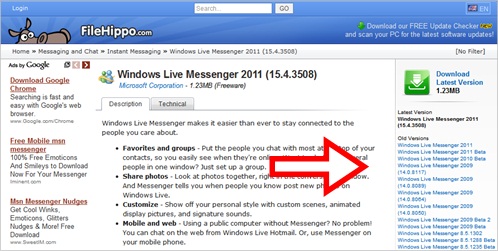
If you are looking for anything older than WLM 2009, go to FileHippo and select your preferred version on the right sidebar.

If you face error messages like “Your computer has a newer version of Windows Live Messenger than the one you are trying to install“, try uninstalling WLM 2011 using Revo Uninstaller, ZapMessenger, or WLMuninstaller for a cleaner uninstall. No guarantees though as I have not tried any of them.
If all else fails
If nothing works after following the above instructions, you still have one last option—to use a portable version of Windows Live Messenger. It works exactly the same as the normal WLM would, except you don’t have to install it, thus eliminating installation problems.
- Download portable Windows Live Messenger from this site (versions available ranges from 6.2 to WLM 2009), or directly download version 2009 from Rapidshare
- Place the .exe file in a folder of its own (portable WLM will create a new folder at the same location the .exe is located to store app data)
- Launch the .exe file, and voila, you will now see the old familiar Windows Live Messenger 2009
This will almost certainly work. Since it requires no installation, you can even place the .exe on a USB flash drive and use WLM on computers that doesn’t allow installations.

Dana - December 16, 2010 @ 10:34 pm
Thanks for this complete options. Now, I can downgrade my live messenger for sure.
Vincent - December 16, 2010 @ 11:03 pm
I myself is keeping WLM 2011, not really bothered by its shortcoming. How do you like it?
Praveen@Techperk - December 23, 2010 @ 2:50 pm
Very good tutorial.I like the way this has been crafted. Keep up the great work. Retweeted
Amr Boghdady - December 25, 2010 @ 4:29 am
Finally!
I was starting to hate MSN so much, that I’ve been using FB chat for the past week!
Thanks for the tutorial Vincent!
Vincent - December 26, 2010 @ 5:10 pm
You’re welcome. I personally think WLM 2011 is not that bad, but maybe I’m not a heavy user.
lea - May 30, 2011 @ 12:43 am
it finally worked! thanks so much. the old msn was so crappy.
boho - July 12, 2011 @ 7:21 am
if i do this, will it delete all the display pix i have?
EURO 2012 HIGHLIGHTS - January 7, 2012 @ 6:41 am
thanks for the complete set of info about msn ! Awesome!
ashton - July 12, 2012 @ 5:51 am
it won’t let me.. it keeps saying i have to upgrade to a newer version. :T